38 Gallon Makeover by Mike Firrincili |
| I had been slowly growing disappointed with my 38G aquarium.
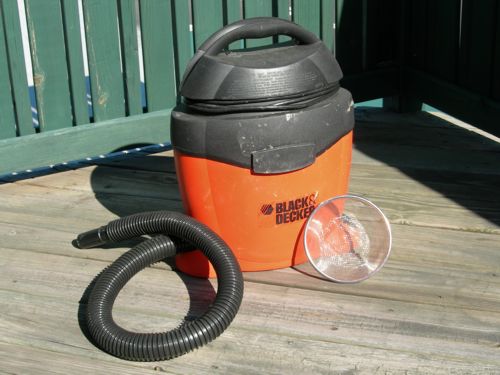
I have always been happy with the driftwood hardscape. It is interesting, and most importantly, I like the way it looks! I thought my plant selection had been pretty good. The Anubias nana “petite” has grown considerably over the past year and looked great on the wooden branches. The Blyxa japonica had formed a thick lush carpet. However, as the aquarium matured, the Cyperus helferi was lacking. It leaned across the top of the aquarium, and blocked out a lot of light. The Cyperus helferi and the Anubias are such slow growers, I started having algae issues. I can understand and live with some green spot algae, but the plants were becoming infested with Black Beard Algae (BBA). I tried Flourish Excel over dosing regimes and spot treatment to eliminate algae to no avail. I gave hydrogen peroxide spot treatment and dosing a try, also without any positive result. I also had a surprisingly difficult time growing any type of foreground whatsoever. 4 x 24 watts of TEK T-5 lighting and I couldn’t grow a thing. I gave dwarf hairgrass a try and it was spotty. Glosso? Nope. Growth was more vertical than horizontal. Hemianthus callichtroides grew in mounds. Utricularia graminifolia didn’t work either. So, I had an infestation of BBA and an inability to grow a foreground. Double whammy! What to do? Well, I always like setting up an aquarium. Choosing new plants is a lot of fun too! Oh! A sand foreground! That would alleviate the need to struggle with trying to grow plants in the foreground. What to do? Start all over again, naturally! TEAR DOWN Tearing down an aquarium is never a particularly fun job. It is all “business” if you ask me. First thing to do would be to put the plants in “storage”. When I broke down the 38G I started by pulling out all the stem and rosette plants. The Ludwigias and the Blyxa japonica were clean and algae free so they were simply placed into small plastic tubs, filled with tap water and put in a bright location. No de-chlorinators or other treatments were added to the water. It really isn’t necessary in my opinion. The Cyperus helferi was so coated with BBA they were removed and discarded. The wood with the masses of Anubias nana ‘petite’, both suffering with BBA, were gently removed from the aquarium to prevent the plants from becoming dislodged and temporarily placed in a large plastic bucket filled with untreated tap water. I then netted out all the fish. The filter was shut off, the UV light was unplugged and the CO2 was shut down. I took all of the equipment out of the aquarium. The filter in and outputs, the Eheim 2126 heater probe, all the glass CO2 lines I run as well as the pH controller probe. Next step was to drain the aquarium. I dropped in a siphon hose as well as employing the use of a Python to expedite the draining process. The water was soon to low for the simple siphon, and the Python finished the job. Removing the existing substrate is one of those jobs we really tend to dread. It is messy. It smells foul. It is devoid of all pleasure. The best way to handle the removal of an old substrate would be to first, take on a workman-like attitude. Realize and accept that the job is going to be unpleasant, but you are going to see it through! I use a small, but strong sieve to scoop out the substrate. Using the sieve will allow you to pick up the existing substrate, while allowing most of the water to drain back into the aquarium as opposed to spilling out on the floor. Take small scoops! The sieve will be lighter and you’ll have less filthy water to deal with. I dump the used substrate into a small bucket lined with plastic bags. I don’t fill the bags up too much. That keeps them light and the amount of water minimal. After filling a bag I immediately tie it up and bring it outside to both prevent leakage and reduce the monotony of the chore. Once the majority of the substrate is removed, I add some water to the aquarium and then Python it right out. That helps remove the majority of silt and filth left behind. Once that bit of water is removed, my next step is to grab the wet/dry shop vacuum. I shop vac out the remaining water along with any left over substrate and mulm. I never save mulm. At this point the aquarium should be completely free of substrate and “substrate residue”.
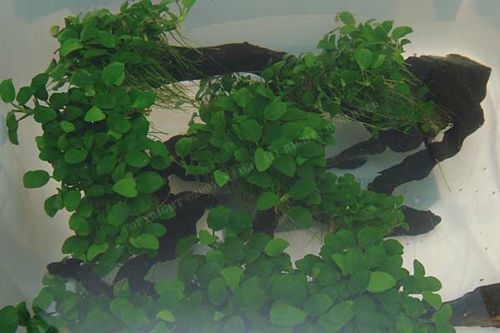
Substrate Removal Tools CLEANING THE AQUARIUM The next step for me was to clean the inside of the aquarium itself. The inside aquarium glass had a bit of algae and it needed to be removed. I filled the clean aquarium about halfway with water. The water makes it easier to first scrape down the inside of the aquarium with a Kent algae scraper, and then follow it up with a stiff algae pad. No easy way to do this, so be prepared to employ some elbow grease! Once the scrubbing is complete, I fill the aquarium all the way and add some bleach. A good shot of bleach will do the trick. I let the aquarium sit with the bleach water for close to one hour. After the hour has passed, I add a good shot of de-chlorinator and drain the aquarium with the Python. Once drained, the inside of the glass is rinsed and wiped down with clean water and paper towel. That water is drained out and the aquarium again filled. A big dose of de-chlorinator is again added. While the aquarium is filled, I give the inside of the glass one final wipe down with a white algae pad. The white pad allows me to be sure all the algae has been removed from the glass, as any left over algae would show up against the white color of the pad. The aquarium is drained and vacuumed out one final time. It is now clean and algae free! CLEANING THE EQUIPMENT Since Black Beard Algae was a part of the reason for the tear down, I really needed to address the rest of the equipment for the 38G. I broke down the filter and tossed out the media. Media is pretty readily available and not too expensive. I figured I’d rather replace it than simply re-use it. I could have bleached the media, but then I’d have to worry about removing all of the bleach from the porous filter media material. By replacing the media, I am sure it will be clean, as well as algae and bleach free. I dropped the media baskets in a five gallon bucket filled with water and bleach. I let that sit for about one half to three quarters of an hour. I didn’t want to let them soak too long. There are some rubber gaskets on the baskets (say that ten times fast), and I didn’t want to damage the rubber. The same went for all of the tap connectors and filter in and out puts. They all got a good soak in bleach and water. Everything was then rinsed, de-chlorinated and left to dry. Since I was sure there was algae in the filter tubing, all of the aquarium’s tubing was discarded and replaced with new. Re-plumbing the aquarium seemed like a no-brainer. Again, the cost was low and the result was 100% algae-free peace of mind. The canister and power head portion of the filter were treated a little differently. Now, this is a Eheim 2126, so there is a heating element inside. Bleach would be way too caustic for the heating element as well as the rubber gaskets around the heating element. Instead I filled the canister with water, and added about one cup of hydrogen peroxide. The hydrogen peroxide was much less caustic on the filter’s heating element, but still deadly to algae. The power head portion of the filter was also washed quite well with hydrogen peroxide. The 2126’s temperature probe and the pH controller probe were cleaned with hydrogen peroxide as well. Same goes for the addressable portions of the UV sterilizer. TREATING THE ANUBIAS After all of the hard work was done the last job needed to be addressed, removing the algae from the Anubias and wood. I had mentioned earlier in this article that both Flourish Excel and Hydrogen Peroxide treatment were pretty much futile. My only recourse was the planted aquarium world’s equivalent of the “nuclear option”……..BLEACH. Bleach was the last resort. It is caustic. It is harsh. However it is effective when used with caution and close attention. I grabbed a clean five gallon bucket and started to mix my bleach solution. I filled the bucket with about four gallons of tap water and reached for the bleach. When using bleach as a disinfectant and algaecide the normal ratio is 1 part bleach to 20 parts water. There are 16 cups per gallon. Four gallons gave me 64 cups. 64 / 20 = 3.2 cups of bleach in 4 gallons of water. However, I was dealing with live plants. Even though Anubias is pretty tough, I had some really nice masses of pretty much irreplaceable plant that I wanted to be extra cautions with. I went with 2.5 cups of bleach in 4 gallons of water just to play it safe. I treated each branch separately, so I could give each one my full attention. I carefully placed a branch in the bucket of bleach solution and watched and waited. I kept a close eye on the algae. Slowly the BBA on the portions of the plants and wood thinned down a little and turned from black to gray. Just as the BBA started to turn white, I removed the branch and brought it over to the sink. I had previously filled the sink halfway with water. I placed the branch in the sink and splashed clean water over the plant. I then used the sink’s spray nozzle to gently rinse down the plant as I filled the sink to cover the plants and wood. Once the branch was submerged I added a huge dose of de-chlorinator and let the plant sit. After the plants sat in de-chlorinator for a few minutes I drained the sink rinsed the wood and plant down one more time and then placed them in a clean tub of water. I didn’t place them in the initial holding tub, as I didn’t want to reintroduce them to any algae or algae spores that may have made their way into that tub. After all the branches and plants were cleaned and in the clean tub, I added one last shot of de-chlorinator just for good measure
Algae free Anubias Everything that I felt was treatable was treated. The aquarium was clean and dry, all the equipment was clean and algae free, and the plants and hardscape were ready to go. The Rebuild Before I could do anything else, I had to get the equipment back in the aquarium, and get the whole system re-plumbed. Re-plumbing was a piece of cake, as was getting the little bit of equipment back into the aquarium. It took just a few minutes. I got the filter back in place and filled it with new media. The only change I made with my filter media was the addition of a big bag of activated carbon. I planned on setting up with ADA Aqua Soil. At times, Aqua Soil can cause some water cloudiness as well as an ammonia spike, so the addition of fresh activated carbon to handle the cloudiness and ammonia spike is a wise move. I got everything was set and in place with the exception of the glass CO2 lines. I would do that after the substrate, hardscape, and plants were in place and before the aquarium was refilled to avoid damaging them. It had been a couple of days since I did the tear down, the clean up and reinstalled all the equipment. I was itchy to get the aquarium back up and running. It was time to grab the phone, call the guys, and get ready to go! Before the guys came over to help out, I got all the necessary items ready. Bags of ADA Aqua Soil, Power Sand and Bright Sand were laid out. I had a plastic mason’s mortar tub filled with the rocks I planned on using to separate the Aqua Soil from the Bright Sand. The plants were in buckets and ready to be set into their new home. We were ready!
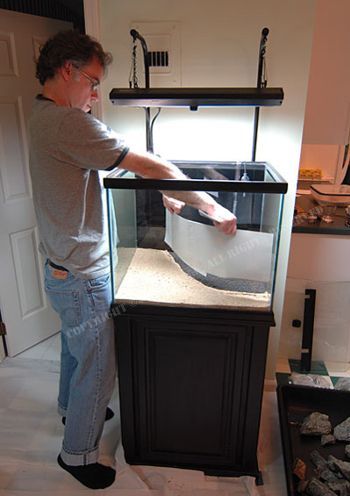
Ready and waiting Walter, Sergio and Jay arrived. First thing we did was develop a plan of action. I knew what I wanted to do and how I wanted the aquarium to look when we were finished. I had to relay that plan to the guys. I threw out my ideas and we bantered back and forth. That is the best part of working on something like this with a few trusted friends. They help you think through your ideas and expose any potential pitfalls in plan or execution. After some discussion and some alteration to my initial ideas, we found ourselves on the same page and we proceeded. THE SUBSTRATE Substrate is the first thing to go in. I have used the full ADA substrate system in the past with great success and satisfaction and I planned on doing so again. I don’t think I’ll ever use anything else again. With the desired lay out in mind, we determined the where the line of demarcation between the Aqua Soil and the Bright Sand would lie. I held a sheet of medium weight cardboard along that line of demarcation. The cardboard is used to help lay in the substrate. It acts as a temporary divider between the Aqua Soil and the Bright Sand as each is laid into the aquarium. Without the use of some sort of divider, it would be absolutely impossible to lay in the two different substrates neatly or without mixing the two accidentally. Using the sheet of cardboard makes the process simple and “frustration free”, as you will see a bit later on. I couldn’t imagine doing a sand foreground any other way. I held the cardboard while Jay, Walter and Sergio positioned stones against the cardboard to hold it in place. Once we had the cardboard positioned, were ready to start installing the substrate. Our first step was an initial dusting of Bacter 100 and Tourmaline BC, two ADA substrate supplements. The Bacter 100 is supposed to “jump start” the bacteria in the substrate by providing micro bacteria in a powered, dormant state. The Tourmaline BC is a mineral compound of iron, aluminum, sodium, boron, lithium and magnesium. Many people skip this step as they feel it is unnecessary. I, on the other hand, am a believer in the ADA substrate system and follow the procedure laid out by Mr. Amano. I just can’t argue with the results he produces! Our next step was a small thin layer of Power Sand. Power Sand is a Peat coated pumice product. The idea behind Power Sand is that the pumice provides and environment for the growth of beneficial bacteria within the substrate, like the ceramic media inside a canister filter. Power Sand provides the surface area and it’s large, irregular grains allow better water circulation within the substrate. The organic coating also fertilizes and provides nutrients. This is another product that some feel unneeded. Some feel there is no tangible benefit to the use of Power Sand. I feel the benefit of using Power sand worth the additional expense. CAVEAT: Some have experienced problems pulling the granules of Power Sand up from the bottom of their layered substrates as they have pulled up plants during aquascaping changes. If you are one to constantly tinker with your aquascape, or don’t have a set planting plan in place before you start up your aquarium you may want to skip the use of Power Sand! The Power Sand is laid out in the area where the Aqua Soil will eventually be placed. I use a very thin layer of Power Sand in my set ups. The layer of Power Sand mimics the shape of the area where the Aqua Soil will be placed, however I keep it about three inches away from the side of the aquarium as well as the edge of the Aqua Soil. That keeps the product out of sight from the side of the aquarium and away from the areas that would be subject to the most replanting (see the CAVEAT). There is no problem with pushing the Power Sand all the way to the rear edge of the aquarium. It is not viewed, and I don’t plan on shifting the plants in the rear often if at all.
Power Sand Aqua Soil is next. With a small plastic tub I gently laid in the Aqua Soil one scoop at a time. Slowly and carefully I built up the substrate. Using the cardboard as a dam, I built a slope from the middle to the back of the aquarium. Creating this slope and making the substrate in the rear of the aquarium higher than the front gives the aquascape more depth. After I had the Aqua Soil placed, we smoothed it out with a piece of stiff cardboard.
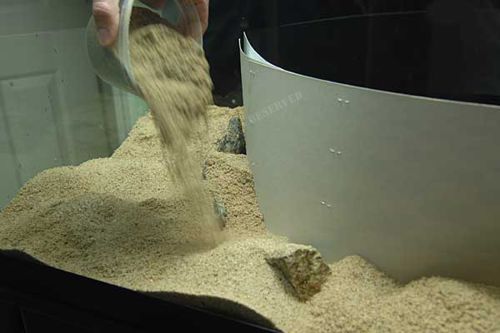
The Bright Sand foreground followed. The Bright Sand was also laid in one scoop at a time. Following the slope, we placed less in the front of the aquarium and built up to the level of the Aqua Soil right behind the cardboard. Doing this gave us a neat, uniform sloped substrate.
Here is a top view of what the completed lay in of the substrate looks like:
Final step in the substrate installation was to remove the cardboard separator. This is done slowly and carefully! We put so much work into getting the substrate just right I didn’t want to mess it up quickly pulling the cardboard out like a magician yanking a tablecloth out from under a fully set table. I slowly shimmied the cardboard back and forth as I cautiously raised it out of the substrate and the substrate was complete.
Voilia! AQUASCAPING It was time to aquascape. Since I was happy with my initial hardscape I wanted to replicate it in my new aquarium. We started replacing the wood as closely as we could. Big pieces first, then the smaller ones. Two hands, four hands, six hands! Everyone helped place the wood. The Anubias had well established itself on the wood. As we placed the pieces on of the guys commented “instant aquascape”! A lot of stepping back, a lot of head tilting, and quite a few hhhmmms. A little fiddling and we had it.
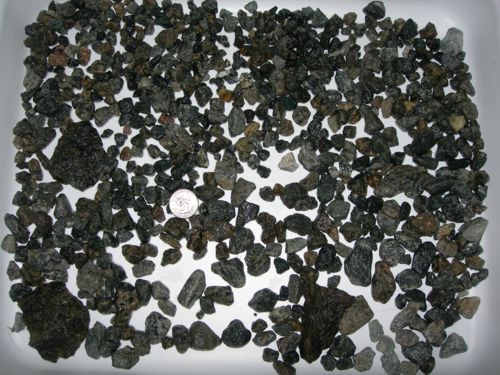
Too many chefs spoil the soup? Not with this crew! Throughout the process of placing the wood, and the rest of the aquascaping process we were constantly wetting down the Anubias with a spray bottle to prevent them drying out. We were diligent with that task. If I wasn’t misting, it was Jay. If it wasn’t Jay it was Walter. If Walter was helping with something else, Sergio grabbed the spray bottle and went to town. The group effort and all that attention was greatly appreciated! Once the wood was in place, it was time to work in the stone. In this case stone was added not to be as much a part of the aquascape, but to act as a barrier between the Aqua Soil and the Bright Sand to prevent the two from mixing. All of the stone I used was locally collected granite. The granite had color components that were complimentary to the sand foreground, so the two materials had a natural blend that lends itself to a more consistent aquascape. Upon the initial set up, I went a little light with the stone. We added pieces that were quite functional for holding the two substrate components apart and added some more ornamental pieces here and there. It is my intention in the future to add some more, smaller stones surrounding some of the larger stones to make the whole aquascape that much more natural looking. I have already hand picked each of the small stones I intend on using and just need the time to execute the plan.
I hand picked each and every one of theses stones. I really need a life! PLANTING Wood covered Anubias, stone, and sand. We were ready to add the rest of the plants. First in was the Blyxa japonica. Not as many plants as in the first incarnation of the aquarium, but a few. I placed those around the base of the largest piece of wood, as well as in a few spots along the inside of the stone barrier. Not so many plants as to make Blyxa japonica the focal point of the aquarium, but as more of an accent plant this time. In my estimation and experience this is the best way to use Blyxa japonica, as an accent. It just doesn’t seem to work as “star of the show” in my opinion.
Lastly, I added some stems of Ludwigia arcuata. I switched over to Ludwigia arcuata at the recommendation of Jay. The plant has a nice red color to it. It is light and has a very, shall I say “airy” feel. The shape of the leaf compliments both the long spike of the Blyxa japonica, and contrasts well with the deep green and roundness of the Anubias nana “petite”. It was a wonderful recommendation that really pulled the aquascape together. I planted the Ludwigia arcuata in the rear of the aquarium, sinking masses of plants to the left and right of the Anubias covered wood. I managed to fit a few stems behind the wood grouping, as well as place a few stems in the mid-ground to add some more depth and to avoid that deliberately placed “Dutch” feel to the aquarium. 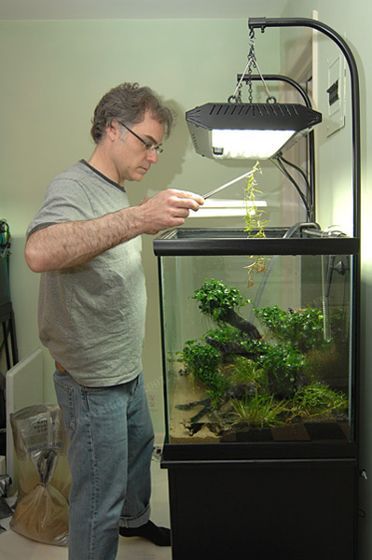 With Walter at the helm, the aquarium was slowly filled. Sergio, armed with the spray bottle, continued to keep the plants moist until they were submerged. Sergio and the spray bottle did double duty. He also sprayed the floating bits of Aqua Soil with water to sink them. As the aquarium filled some of the wood shifted, which prompted some innovative forms of bracing. However once things settled all our bracing was removed, I hooked up the CO2 system, and our aquascape was complete.
Not a bad way to spend a Wednesday night! I do have to say a huge thank you to Jay, Walter and Sergio for all their help. Not only would I have had a heck of a time completing the re-aquascaping myself, I wouldn’t have had half as much fun. Thank you! |